How to use Banner Types
in Revive Adserver
This article explains all the types of banners that can be created in the Revive Adserver software and explains how to use each type.
Introduction
There is an article explaining how to create an image banner, but the Revive Adserver software also supports other types of banners. This article explains the different types of banners you can create.
Selecting the banner type
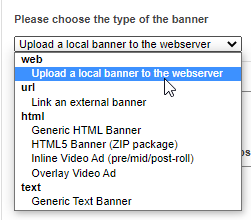
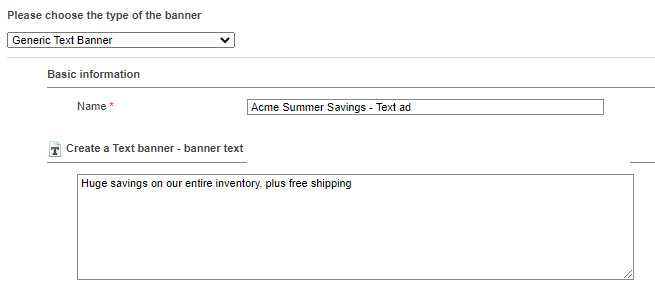
While creating a new banner, the banner type is set to “image banner” by default. There is a drop down list at the very top of the screen that enables you to select any of the other types.
As soon as you select any of the other banner types, the content of the ‘new banner’ screen will change to display the specific fields and controls needed to create that type of banner.
Supported banner types
The banner types supported by Revive Adserver out of the box are:
- Image banner, created by uploading an image file
- External Image banner, created by entering the URL of an image already hosted elsewhere
- Generic HTML banner, created by entering HTML or JavaScript code into a text box
- HTML5 banner, created by uploading a Zip file that’s been built to the HTML5 standard
- Inline video ad, for use in a pre-roll, mid-roll, or post-roll setting in video players
- Overlay video ad, for use as an advertisement overlaying a video ad (either an image or a text ad)
- Generic Text Banner, can be used to create an ad that is just a string of text with a link
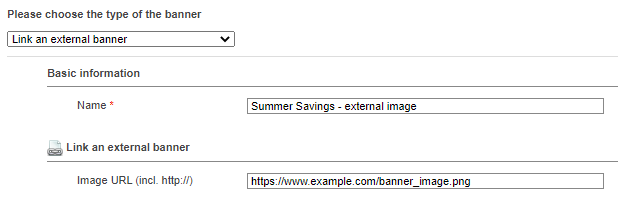
Basic information
Enter a name for the new banner first, making sure to make it’s both clear and concise.
Link an external banner
Next, enter the URL of the banner that is being hosted (elsewhere). It is important to make sure that the URL is correct. One simple way to check this is to simply open a new tab in your browser and pasting the URL into the address bar. If the banner image is displayed, the URL is correct.
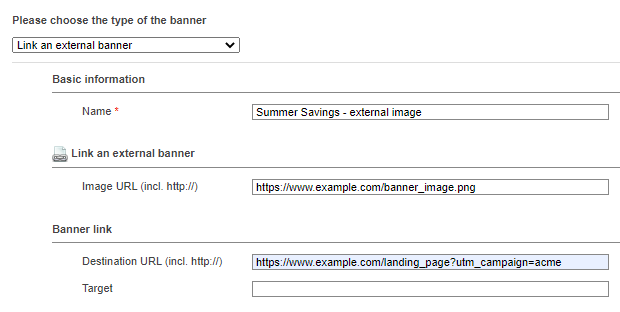
Banner link
The next field to enter is the URL that visitors need to go to when they click the banner once displayed on a website. Again, it might be a good idea to open a new browser tab, and paste the destination URL in the address bar. That’ll help you to make sure the URL actually exists and works correctly.
The Target field can be used to specify how the browser must behave when the banner is clicked. The default is to leave this field empty. That will have the effect of opening a new browser window or tab when the banner is clicked.
Banner display
The Alt text field can be used to enter a bit of text that will be displayed as a ‘hint’ when a visitor hovers the banner with their mouse. Some screen readers will also be able to use this text to assist visitors with visual impairments.
The Status text field is present just because of backward compatibility, but modern browsers will simply ignore this.
The Text below image field can be used to enter some text that will be displayed just below the actual banner image. Keep in mind that this may cause the webpage on which the banner gets displayed to be skewed. We recommend not entering anything here.
It is mandatory to enter the size of the externally hosted image by specifying the height and the width of the image expressed in pixels. The Revive Adserver software will accept whatever numeric values you enter, even if they don’t match the actual dimensions of the image. Entering a width of 728 pixels and a height of 90 pixels will make an image that’s actually 300×250 pixels look very strange, of course.
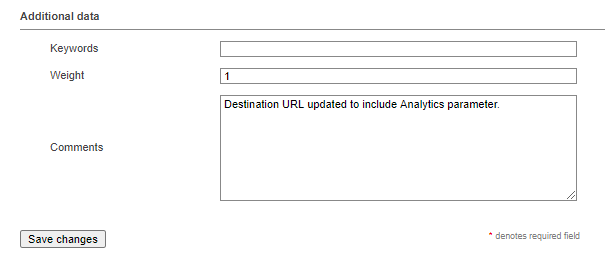
Additional data
The Keyword field is available for advanced use cases that are outside of the scope of this article. We do not recommend entering anything here. If you do enter something, it will almost certainly be completely ignored.
The weight field can be used to specify a numerical value that determines how often this particular banner gets displayed relative to the other banners in the same campaign. There is a separate article explaining how to use Banner weights.
The comments field can be used to enter some notes about the banner, for example to record when and what is changed or by who.
Don’t forget to save the new banner (or to save whatever changes you’ve made to an existing banner).
Generic Text Ad
This type of ad looks exactly like a regular link, but it comes with the capability to count the impressions and clicks of the link.
Here is a preview of what a Text ad might look like on a website:

Basic Information
To create a generic text ad, start by entering the name of the banner. Make sure to enter a clear yet concise name to make it easily recognizable later.
Banner text
Next, enter the text that must appear for the visitor of the site. This will be the link that they can click on.
Banner link
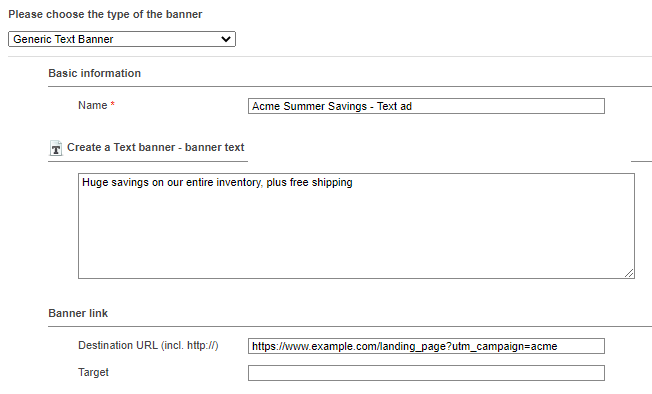
In the Destination URL field, enter the URL that the visitor will go to when they click the ad. Make sure that the URL is correct and is working as expected. One way to check this is to open a new tab in your browser and pasting the URL into the address bar.
The Target field can be used to specify how the link must behave when clicked. We recommend simply leaving this empty, which will have the effect of opening the landing page in a new tab or new window in your browser.
Banner display and Additional data
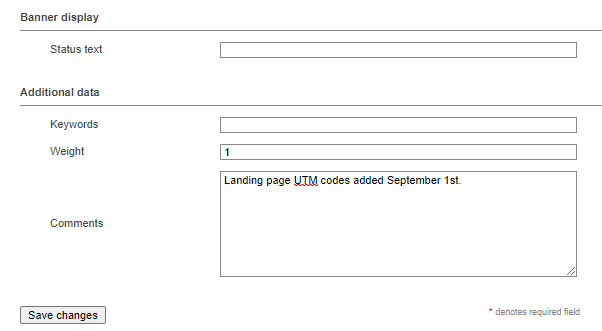
The Status text field is present for backward compatibility, but it will be ignored by modern browsers. Simply leave this empty.
The Keywords field is also for backward compatibility, it will not be used by the software. Simply leave this empty as well.
The Weight field can be used to enter a numerical value, which will determine how frequently this ad gets displayed relative to other banners of the same type in the campaign. There is a separate article about banner weights. Simply leave the default value of 1 unless you know exactly what you’re doing.
The Comments field can be used to enter some notes about the banner, for example about what has been changed. Keep in mind that other users who can access this screen can also see these comments.
Don’t forget to save the changes once you’ve completed entering all the fields.
Video Ads
The Revive Adserver software has had features for video ads for many years.
Starting with version 5.5.0, there is support for the widely accepted VAST2 protocol.
Please have a look at the articles that explain how to create video ads, and how to create and use video ad zones.
Articles about How to Use Revive Adserver
Websites
Check out the Hosted edition of Revive Adserver
Keen to start using the Revive Adserver software, but not so keen to download and install it on your own server? Revive Adserver Hosted edition might be just right for you!
