How to create an advertiser
in Revive Adserver
This article explains how to create an advertiser in the Revive Adserver software, with some tips and best practices from the developers.
Creating an advertiser
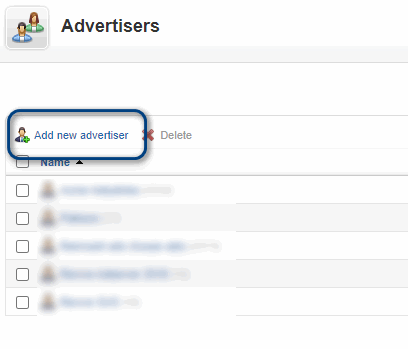
To create a new advertiser, first navigate to the Inventory tab. By default, this will display the overview of existing advertisers (or an empty list if it’s a new installation). Then click the Add new advertiser link at the top of the list.

Basic information
In the form that appears, start by entering the basic information for the new advertiser.

Tips:
We recommend entering the name of the company (or person) with whom you or your company have a financial relationship, for example “Advertiser name”. If the client is an agency representing the actual advertiser, you could consider entering both, for example: “Agency name – Advertiser name”. The advantage of this approach is that you will be able to more easily find the advertiser’s record again in the future, when your list of advertisers has grown.
If you have another system (like a CRM application or bookkeeping software), you could consider adding the external reference number of that system in brackets behind the name. That will enable you to easily reference an advertiser across both systems. For example: “Advertiser name (042)”.
The field ‘Contact’ can be used to enter the name of the main contact at your advertiser or at their agency. You could also use it to enter the name of the person responsible for the advertiser within your own organisation.
The field ‘Email’ can be used for that person’s email address. The Revive Adserver software doesn’t do anything with this email, unless you were to tick one or both of the checkboxes for emailed reports in the next section of the screen.
Both fields are mandatory.
Advertiser reports
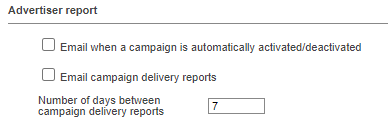
In the section for Advertiser reports, tick the checkboxes for any of the features you’d like to enable for this advertiser:

When you tick the checkbox labeled ‘Email when a campaign is automatically activated/deactivated’, the Revive Adserver software will send emails to the email address entered above. These emails are:
- A notification to let them know that one of their campaigns has started
- A notification to let them know that one of their campaigns has ended
These notifications are always sent at midnight (relative to the time zone settings of the account as a whole), except when the deactivication notification is notified by another condition than a fixed end date.
When you tick the checkbox labeled ‘Email campaign delivery reports’, the Revive Adserver software will send an email report at regular intervals, to the email address entered above.
The frequency of these emails is by default every 7 days, but this can be changed.
These emailed reports are always sent at midnight (relative to the time zone settings of the account as a whole).
Miscellaneous
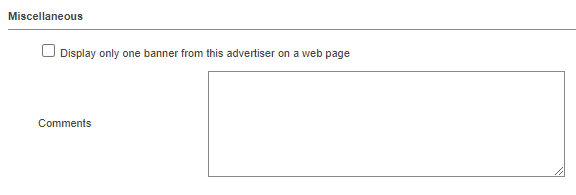
In the Miscellaneous section of the form, there is a checkbox to indicate that you want at most one banner from the advertiser to appear on a page of the sites where their campaigns are running. This will work across all of their campaigns at any given time. Obviously, this will restrict the ability to deliver the advertiser’s campaigns, including potentially causing under-delivery issues.
In the comments field, you can post any comments or notes for future reference. Keep in mind that anyone else with a username that can access the advertiser properties will be able to read these notes as well.

Advertiser overview
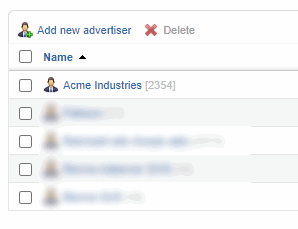
Once you’ve filled out all the necessary information, don’t forget to Save. As soon as you click the Save changes button, the data will be stored in the database and you will see the overview of the advertisers, with the newly added advertiser present.

Next steps
From there, you can proceed to create the first new campaign for the advertiser, or you can click the advertiser’s name to review the properties, to add an optional conversion tracker, or to create usernames for other people who need to be able to log in to review the advertiser’s delivery statistics.
Articles about How to Use Revive Adserver
Websites
Check out the Hosted edition of Revive Adserver
Keen to start using the Revive Adserver software, but not so keen to download and install it on your own server? Revive Adserver Hosted edition might be just right for you!
