How to use Campaign Types
in Revive Adserver
This article explains the campaign types in Revive Adserver, and provides some tips and best practices for using them.
Campaign Types
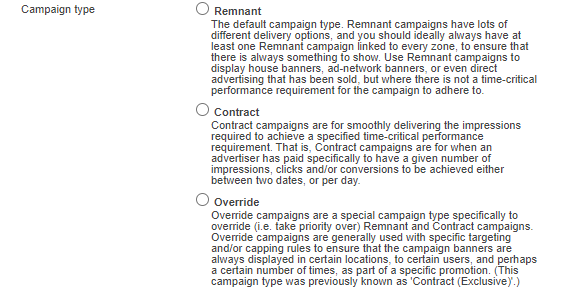
When you’re creating a new campaign in Revive Adserver, you can select from a number of campaign types:
- Remnant
- Contract
- Override
For a definition and description of the use case of each type, please continue reading this article.
Our example website explained
For this article, let’s use an example of a really simple website with a single page, and a single zone on that page. This fictional site gets 30 million page views per month, and consequently the zone gets 30 million impressions per month. Not every day of the month will be the same, so even though the average number of impressions will be 1 million per day, the actual number is going to fluctuate a bit. Most likely, the numbers will be a bit above average on weekdays and a bit below average during the weekend.
Creating a remnant campaign
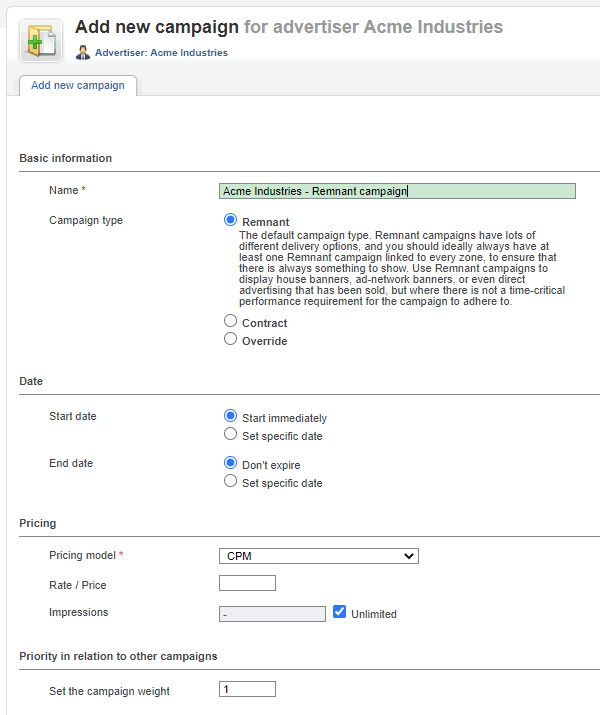
When you’re creating a new campaign, first enter the name of the campaign (and don’t simply accept ‘default campaign’!), and then select the appropriate campaign type.
Once we do that, the rest of the campaign properties appear, with the appropriate fields for a remnant campaign.

Creating a remnant campaign doesn’t require many settings (although it is possible to use them). Apart from the name and selecting the Remnant type, simply accept the defaults.
The term ‘remnant’ refers to the fact that this campaign will get every impression that ‘remains’ as in not being used by any other campaigns.
Therefore, if we leave everything at the defaults for this new campaign, and if this campaign is the only one that’ll be linked to that one zone mentioned above, then by definition, the new remnant campaign will get all 30 million impressions available per month for the zone in our imaginary website.

Many publishers will have at least one remnant campaign linked to every zone at all times. This ensures that every single impression that the site receives will be filled with a banner from the remnant campaign, instead of being ‘wasted’ by triggering a blank impression. Good choices for remnant campaigns could be Google AdSense, house ads to promote a newsletter, or the site’s own merchandising store, just to name a few examples.
Should we have created two remnant campaigns, both with identical settings, and we link both of them to the zone, then each remnant campaign will automatically get half of the available impressions, approximately. There could be a tiny discrepancy between them, but normally speaking they would each log 15 million impressions per month.
Creating a Contract campaign
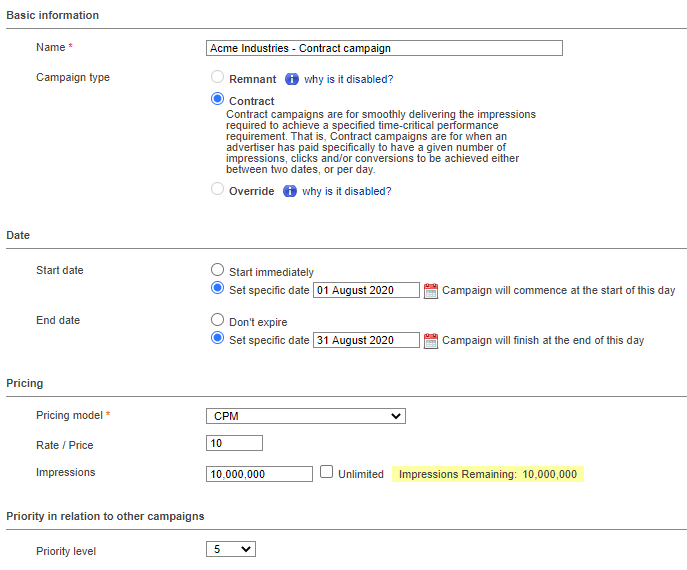
With the aforementioned Remnant campaign already running, let’s assume that the publisher agrees to run a paid campaign for one of their advertisers. The campaign will run for a single month, starting on the first of August and ending at the very last day of the same month. The advertiser has asked for 10 million impressions in total, to be delivered over the course of the month in relatively equal amounts per day.
To create this Contract campaign, set it up in Revive Adserver as follows:

Effect on ad delivery for all campaigns
Having added this new Contract campaign, with just the single Remnant described above still running as well, the effect in our example is going to be:
- Of the 30 million impressions available, 10 million will be used to display the Contract campaign’s banners.
- The remaining 20 million impressions will therefore remain for the Remnant campaign.
Delivery over the duration of the contract campaign
With the contract campaign created as pictured above, the Revive Adserver software will automatically adjust the delivery pattern on a day by day and even on an hour by hour basis, with the aim of achieving the desired total of 10 million in the very last hour of the last day of the month.
The contract campaign will, on average, get 10 million divided by 30 = 333,333 impressions per day. However, not every day will be the same. For example, if the campaign were to run a little bit slow on one day, the Revive Adserver software will automatically compensate for that the next day(s), in order to get things back on track.

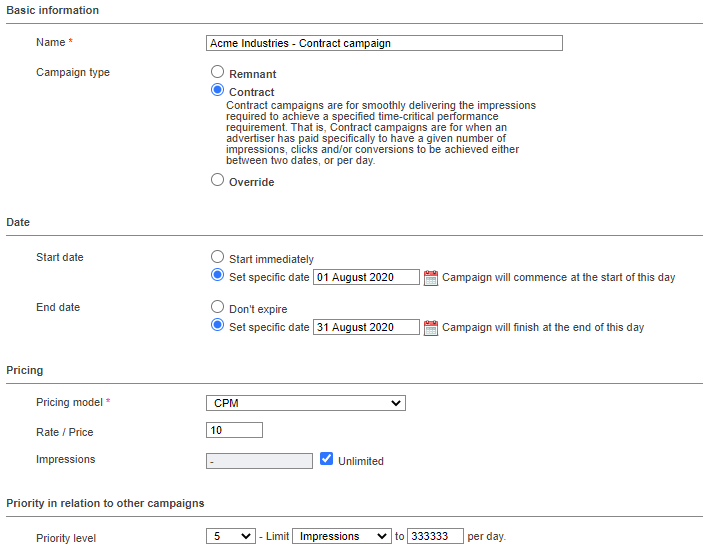
While this will work almost identically to the first approach, there is an important difference: if this contract campaign – for whatever reason – does not achieve its daily target of 333,333 impressions on day X, the Revive Adserver software will not compensate in any way on the next day. At the same time, it will generally not go above the daily budget. As a result, defining a contract campaign like this will almost always end up delivering less than the intended 10 million impressions overall.
In order to let the Revive Adserver software do its job as much as possible and to achieve campaign results with a hand-off approach, we recommend to use the approach of setting a start and end date, plus a campaign total, and then just let the campaign run its course. Try to resist making manual changes, especially in the beginning, and in almost all cases the software will achieve the desired results. Of course, this does assume that there is sufficient volume of impressions available to begin with to satisfy the targets of all contract campaigns combined.
Creating an Override campaign
As the type name implies, the Override campaign type will take priority over all other types, in order to achieve some specific outcomes. Here are a few examples of what an Override campaign can be used for:
- An advertiser wants to display a high impact ad to every visitor to the site, but only once per visitor. This can be achieved by creating an Override campaign, with a frequency cap of 1.
- An advertiser wants to display a campaign to every visitor from a specific town. This can be achieved with an override campaign with a geotargeted banner. When the visitor is from the specific town, the override campaign gets selected, in all other cases the pre-existing mix of the contract and remnant campaigns will be used.
Other than their priority over other types, Override campaigns are very similar to Remnant campaigns, their properties are virtually identical.
We recommend only using Override in very specific cases similar to the examples mentioned above, and to use regular Remnant and Contract campaigns as much as possible.
Articles about How to Use Revive Adserver
Websites
Check out the Hosted edition of Revive Adserver
Keen to start using the Revive Adserver software, but not so keen to download and install it on your own server? Revive Adserver Hosted edition might be just right for you!
