How to create an HTML5 ad
in Revive Adserver
This article explains how to create a banner in Revive Adserver by uploading an HTML5 ad.
Introduction
There is an article explaining how to create a regular image banner in Revive Adserver, and another article explaining some of the other types of banners.
This article specifically shows how to create a banner for an HTML5 ad that was provided by an advertiser or their agency.
Developers and designers can create HTML5 ads using a variety of tools. These tools are supposed to export these ads in a specific format, which has been defined by the IAB (Interactive Advertising Bureau, an industry organisation for the online sector). Everything that the ad needs is stored in a single Zip file. Most likely you will have received the Zip file via email or some other channel. Simply store the Zip file on your computer, and do not unpack it.

HTML5 logo
Getting started
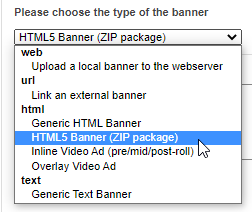
Start by clicking the “Add new banner” link as usual. In the drop down list for the various banner types available, select the option “HTML5 banner (ZIP package”).
As soon as you select that option, the layout of the New banner screen will change to reflect the fields necessary for an HTML5 ad.
Basis information
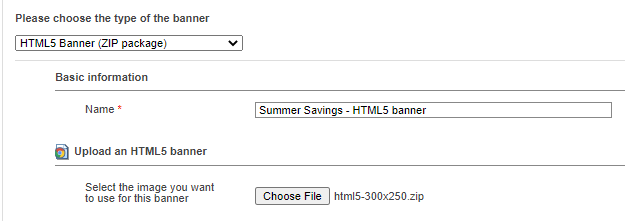
Enter the name for the new banner, making sure it’s clear and concise. This name will appear in overviews and statistics later, so a clear name will help you recognize what’s what later on.
Upload File
Next, use the “Choose file” button to open the Explorer/Finder and look for the Zip file you saved earlier. Once selected, the name of the file will appear next to the button.
Banner link
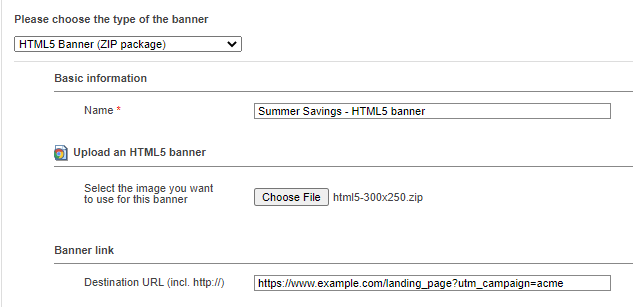
In the field labeled Destination URL, enter or paste the exact URL that someone clicking the banner must go to when they see the banner on a website.
Consider checking the Destination URL is correct and works, by opening a new tab in your browser and pasting the URL in the address bar.
Banner display
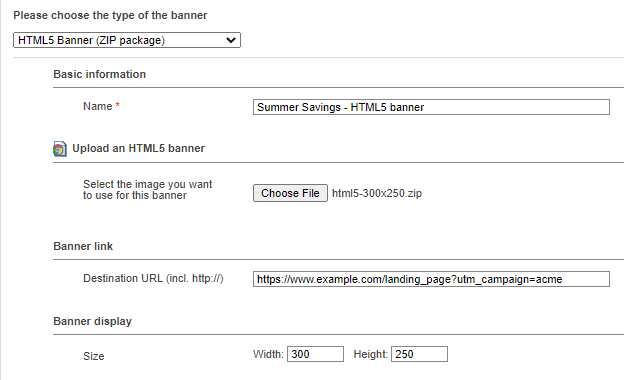
Enter the size of the HTML5 ad by specifying the width and the height, expressed in pixels. This is usually provided by the advertiser or their agency, and in many cases they will also mention these in the file name of the ad.
Make sure to enter the dimensions correctly, otherwise the ad will look chopped or skewed when display on the website.
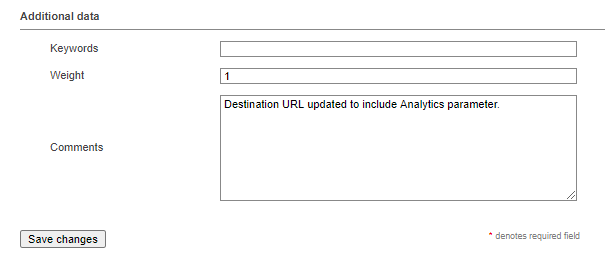
Additional data
The Keyword field is available for advanced use cases that are outside of the scope of this article. We do not recommend entering anything here. If you do enter something, it will almost certainly be completely ignored.
The weight field can be used to specify a numerical value that determines how often this particular banner gets displayed relative to the other banners in the same campaign. There is a separate article explaining how to use Banner weights.
The comments field can be used to enter some notes about the banner, for example to record when and what is changed or by who.
Don’t forget to save the new banner (or to save whatever changes you’ve made to an existing banner).
Articles about How to Use Revive Adserver
Websites
Check out the Hosted edition of Revive Adserver
Keen to start using the Revive Adserver software, but not so keen to download and install it on your own server? Revive Adserver Hosted edition might be just right for you!
