How to create VAST2 video ads
in Revive Adserver
This article describes how to create VAST2 video ads.
New Feature
Update to v5.5.0 or higher required.
This functionality was first added to Revive Adserver with v5.5.0, released on September 13, 2023.
The latest version of Revive Adserver Download edition can be found at any time at www.revive-adserver.com/download/ .
Creating Video Ads in Revive Adserver
In this article, we’ll describe how to create video ads. There are 2 types of video ads that you can create in Revive Adserver:
- Inline video ad (using a video file directly)
- Inline Network video ad (using a VAST2 URL provided by another party)
An explanation with detailed instructions for each of these types an be found by scrolling down on this page.
Creating an inline video ad
This type of video ad makes use of a self-hosted or directly retrievable video file, and it gets served directly by the Revive Adserver software into the video player.
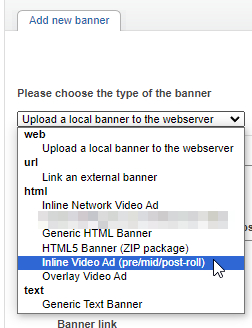
To make this type of video ad, start by creating a new banner as always. In the first screen that appears, we’ll have to select the proper type of ad, which is “Inline Video Ad”.
As soon as this type has been selected, the input form for the new banner changes to reflect the fields and settings that are relevant to this type of video ad.
Enter banner name
As always, start by entering the name of the new banner. Type something that’s clear and concise, so that it’s easy to recognize later.

Enter ad details
Proceed by entering the details of the ad.
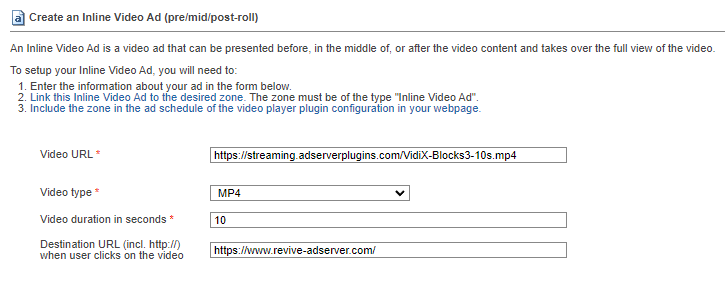
- Select the Video Delivery Method.
Nowadays, it will almost always be Progressive HTTP. - Enter the URL of your video file.
In most cases, you will have received this file from your advertiser, or the agency that works on behalf of the advertiser. Make sure that you first upload it to a webserver.
In some cases, the advertiser or their agency will host the video file on their own server, and then they should have sent you the URL for the video.
You can always check if the video file’s URL is correct by simply pasting it into the address bar of a new tab in your browser. If it starts to play, it works.
Nowadays, with most websites running on a secure address (starting with https), you will have to make sore that the URL of the video file also starts with https. - Select the type of the video file to match the video type you’ve uploaded. Revive Adserver supports mp4 and webm files.
- Enter the duration of the video ad in seconds.
- Enter the URL of the destination that should be opened when a site visitor clicks the video ad while it is being played in the video player. This is also often referred to as the Landing page.
(click to enlarge)
Note about Video File URL
The VAST2 functionality in Revive Adserver does not include anything related to uploading and hosting your video ad files.
You will have to first upload your video file to your website, to a CDN (Content Delivery Network), or streaming service.
Note that it is NOT possible to use a video hosted on YouTube as your video ad.
Third party impression tracking
The Revive Adserver software will automatically count how often the video ad has been delivered. However, the advertiser or their agency may also want to count those impressions using their own system. In that case, they will have to provide the URL of the measurement beacon. You can enter that into the appropriate field. This is entirely optional.
For the purpose of this tutorial, we’ll skip the rest of the form fields, since they are entirely optional and intended for use by experienced users only.
Make sure to save your newly created inline video ad.
Banner overview and video preview
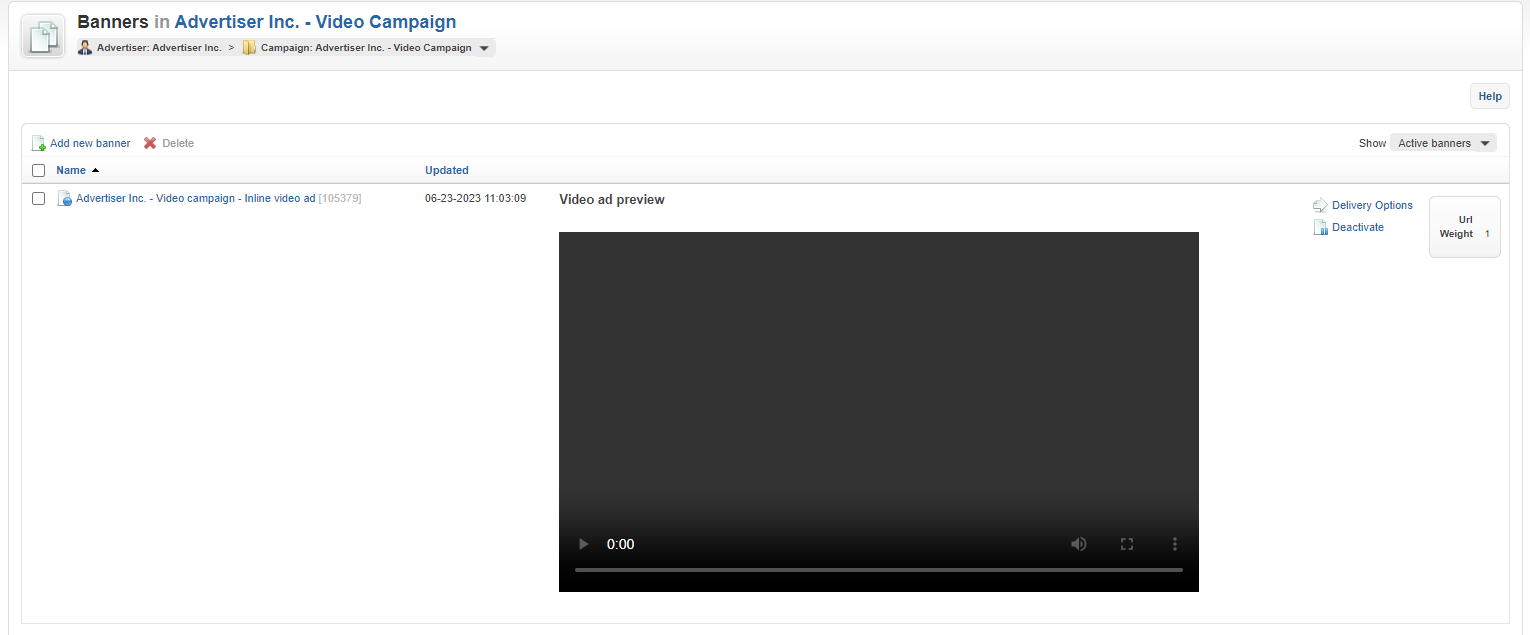
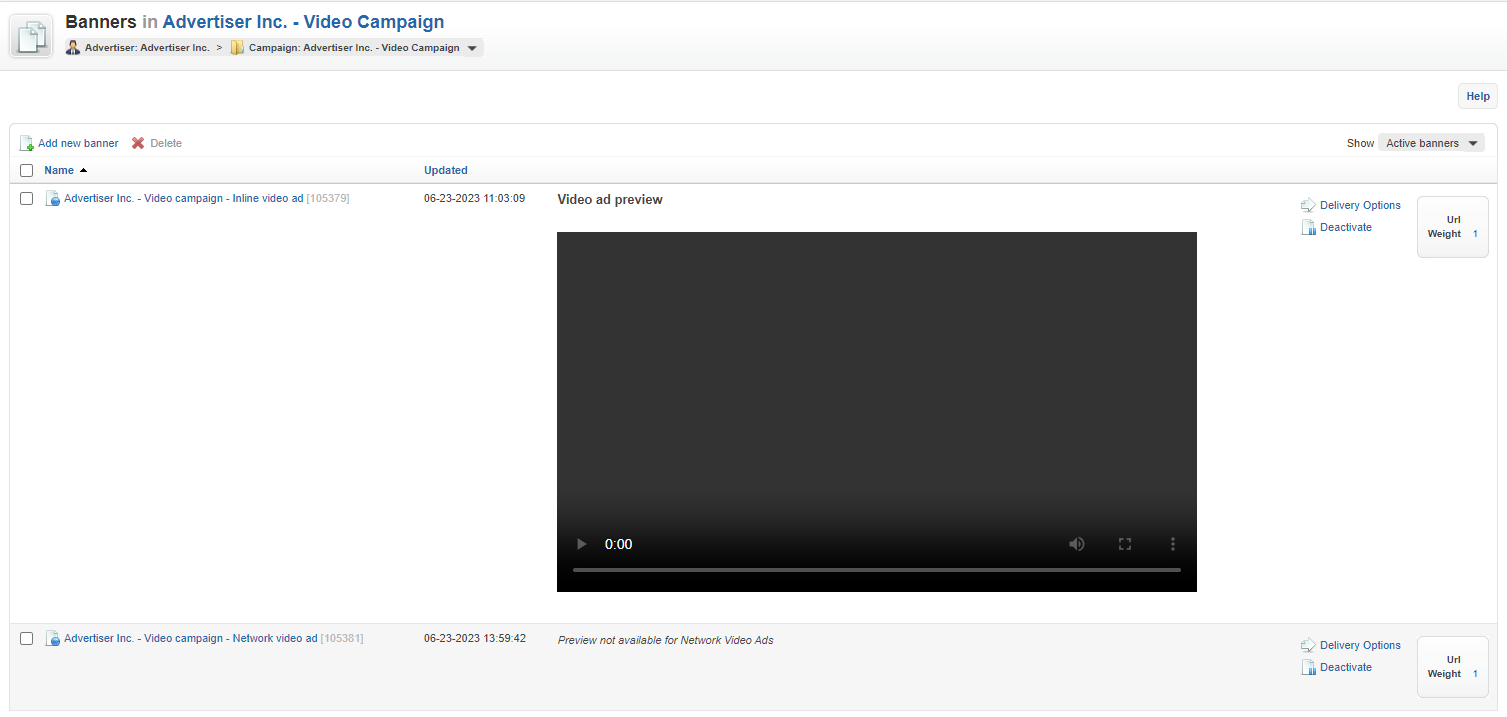
You will now return to the list of banners in your campaign, and you should see a video player embedded in the overview that enables you to play the video ad in order to test it. The video player will also appear at the top of the screen when you view an existing inline video ad.
Creating an Inline Network Video Ad
This type of video ad makes use of third-party video ad that’s delivered by an external system, typically another ad server. This enables advertisers or their agencies, or video ad networks, to manage their campaigns in their own systems, while sending a simple URL to a publisher or other types of inventory.
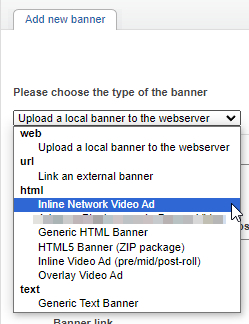
To make this type of video ad, start by creating a new banner as always. In the first screen that appears, we’ll have to select the proper type of ad, which is “Inline Network Video Ad”.
As soon as this type has been selected, the input form for the new banner changes to reflect the fields and settings that are relevant to this type of video ad.
Enter banner name
As always, start by entering the name of the new banner. Type something that’s clear and concise, so that it’s easy to recognize later.

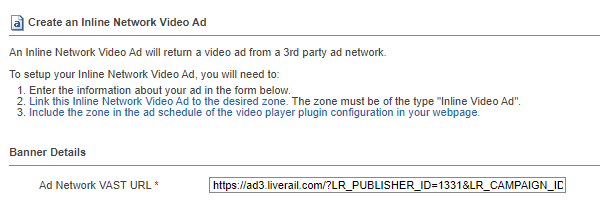
Banner details
Proceed by pasting in the URL of the external video ad you’ve received from the advertiser, their agency, or a video ad network or other type of monetisation service.
For the purpose of this tutorial, we’ll skip the rest of the form fields, since they are entirely optional and intended for use by experienced users only.
Make sure to save your newly created network video ad. You will now return to the list of banners in your campaign.
What’s next?
In order to benefit from the full VAST2 functionality, you’ll also need to have a look at the article describing how to create and use VAST2 video ad zones.
Articles about How to Use Revive Adserver
Websites
Check out the Hosted edition of Revive Adserver
Keen to start using the Revive Adserver software, but not so keen to download and install it on your own server? Revive Adserver Hosted edition might be just right for you!
