How to link a campaign to zones
in Revive Adserver
Once a campaign has been created, it can be linked to one or more zones that have been prepared in advance. This article explains the benefits of linking an entire campaign to the appropriate zones.
After a campaign has been created, it can be linked to the zone(s) of the website(s) where the campaign’s banners must be displayed. You can do this even when you haven’t added the banners yet.
Linking a campaign to zones
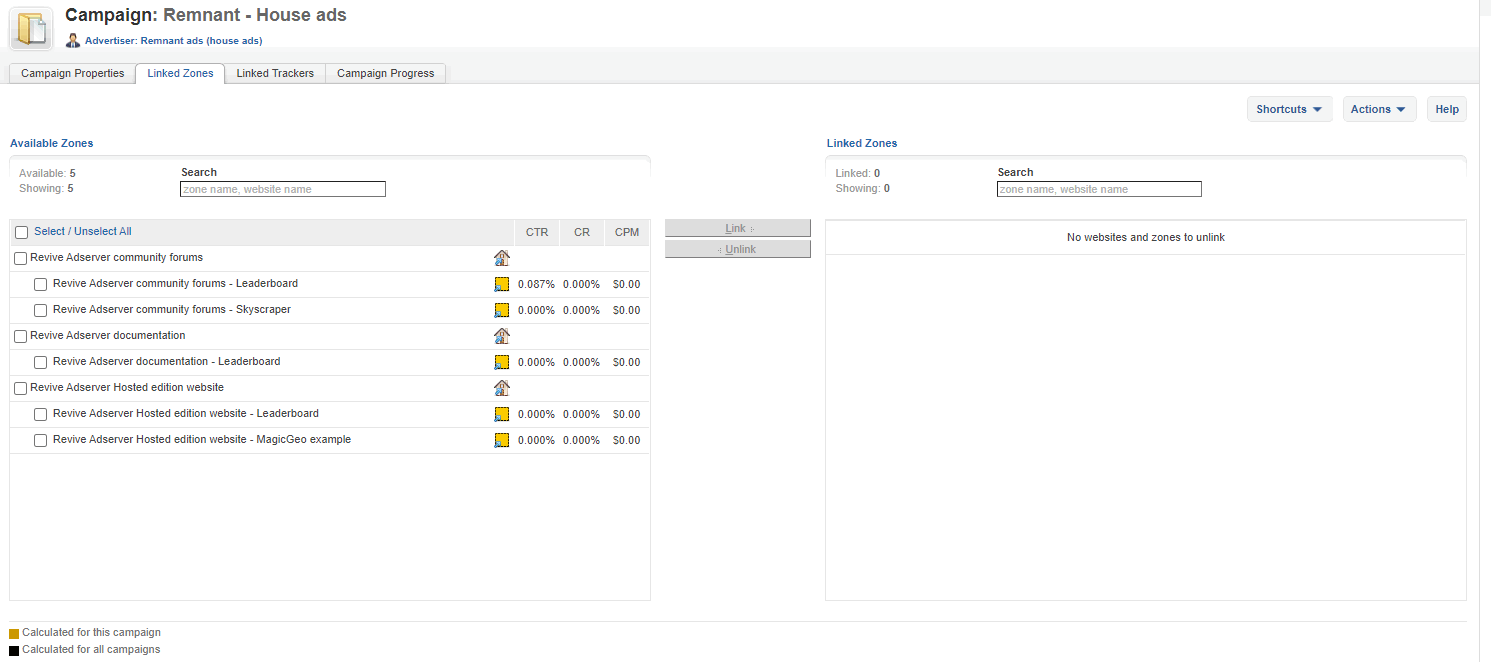
Once the campaign has been created and you have returned to the Campaigns Overview page for the advertiser, click the name of the newly created campaign again, and then click the “Linked Zones” tab, as shown here:
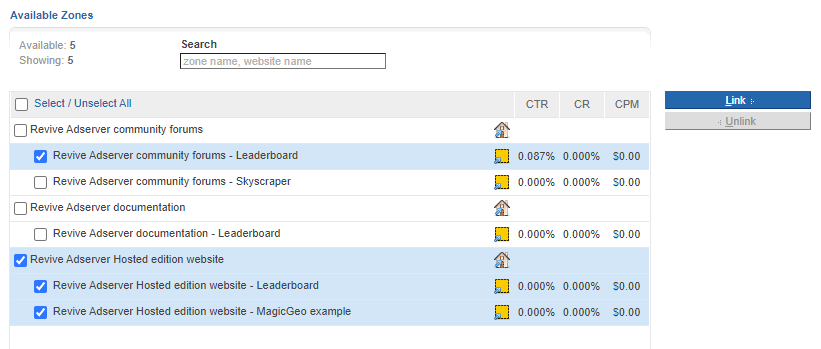
The list on the left shows all the zones that are currently available for linking, grouped by website, each with a check box.
You can simply tick the zone(s) you need for the campaign. You can even tick a website and that will automatically select all the zones that belong to it.
As soon as you have selected at least one of the zones on the left, the “Link” button in between the left and right lists is enabled. Clicking that button will move the selected zones from the list of Available zones on the left to the list of Linked zones on the right. You don’t even have to save anything, the link is effective immediately.
If you’ve missed a zone for linking, you can just repeat the process. If you’ve accidentally linked a zone that shouldn’t have been linked, you can move it back by selecting it on the right list and then clicking the Unlink button.
If your list of sites and zones happens to be rather long, you can use the search box above either of the lists to filter it in order to more quickly find the right zone(s). Here you will immediately discover that using a clear and consistent naming convention for your site and zone names pays off hugely!
Benefit of linking a campaign to zones
The main benefit of linking an entire campaign to one or more zones, is that all banners in that campaign will be linked to all the selected zones. The Revive Adserver software will use the dimensions (width and height) of the banners and the dimensions of the zones to automatically match everything so it fits. A 728×90 pixel leaderboard size banner will only be delivered on 728×90 leaderboard size zones, for example. So this will save you considerable time.
This applies even to banners that you add to the campaign later, after linking the campaign to the zone(s).
Keep in mind that if you create an additional zone in the future, the campaign must be linked to that new zone as well.
Linking banners to zones?
If you do not want all banners to serve via all zones of the zones with the corresponding sizes, it is possible to link individual banners to individual zones. This is obviously more time consuming, but it does allow for greater precision. There is a separate article about linking banners to zones.
Articles about How to Use Revive Adserver
Websites
Check out the Hosted edition of Revive Adserver
Keen to start using the Revive Adserver software, but not so keen to download and install it on your own server? Revive Adserver Hosted edition might be just right for you!


