How to create a campaign
in Revive Adserver
This article explains how to create campaigns in Revive Adserver, with best practices and tips from the developers.
Creating a new campaign
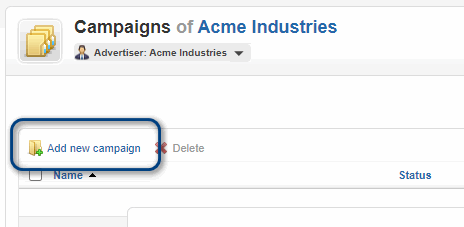
For any new or existing advertiser, you can create a new campaign in two ways:
- Go to the Advertisers overview page, and click the “Add new campaign” link on the right side of the line for the relevant advertiser
Campaign Name
Start by entering the name of the campaign. By default, the Revive Adserver software will propose a name consisting of the name of the advertiser and the words “Default Campaign”.
We strongly recommend entering a real name for the campaign, instead of going with the proposed default, in order to make it easier to find the right campaign in the future when your number of campaigns across all advertisers grows.
Some best practices for campaign names:
- Consider adding an indication of the start date into the campaign name, so that the alphabetical list of campaigns in the overviews and in your statistics is also a chronological list. For example, a campaign starting on the first of August 2020 for advertiser Acme Industries, promoting the Summer Savings deals, could be named “Acme Industries – 20200801 Summer Savings”.
- Keep the name as short as possible, but make sure it is clear so that you will be able to quickly recognize and pick the right campaign for managing it in the future.
Campaign Type
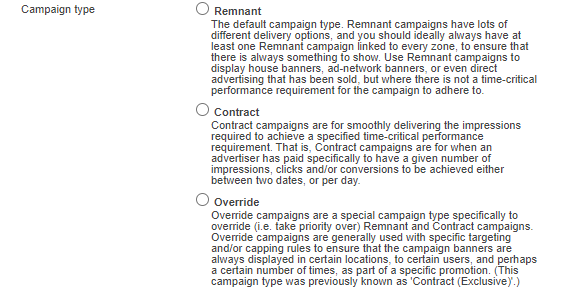
Next, select the appropriate Campaign Type: Remnant, Contract, or Override.
Once the campaign type has been selected, the rest of the campaign properties will appear.
Start date and End date
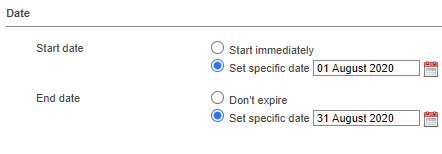
A new campaign must have a start date. By default, the Revive Adserver software will present “Start immediately”. However, you can enter any date in the future. Most people will create new campaigns well in advance of the start date, as soon as they have received the campaign instructions from the advertiser or from their colleagues in ad sales.
Start date
If you enter a start date in the future, the campaign will begin at midnight of that day, so the entire 24 hours of the day are part of the campaign. In other words, the start date is inclusive. The time is relative to the settings of the account of the Revive Adserver installation, not of the people visiting your website(s).
The Revive Adserver software will allow you to enter a start date in the past, but this makes little sense in almost all cases. It literally means that the campaign is behind target from the very beginning.
It is not possible to enter a specific time of day for the start or end of a campaign.
End date
It is not mandatory to enter an End date, and if you leave the proposed setting of “Don’t expire”, the campaign will continue to run forever, or until some other condition occurs that halts it (see below in the section about Pricing for example).
If you do enter an End date, the campaign will end at midnight of that day, including the entire 24 hours of that day. In other words, the end date is inclusive. Just like with the start date, the end date and time is relative to the settings of the Revive Adserver installation, and not of the time settings on the computer of the people visiting your website(s).
Campaign Pricing
By default, the CPM pricing model will be selected. The rate field will be empty, representing a value of zero. The number of impressions for the campaign will be set to Unlimited.
There is a separate article explaining all available pricing models and some best practices about each of them.
Priority in relation to other campaigns
- For a remnant or override campaign, you can enter a campaign weight, which determines how frequently the campaign’s banners will be displayed relative to the weight of all other campaigns of the same type. The default weight value is “1”. It is recommended to leave that value unless there is a specific need to change it.
There is a separate article explaining how to use campaign weights.
Note: a weight of “0” can be entered here as well. Effectively, this means that the campaign will not run anymore. It can be very confusing for you and your colleagues, so use this wisely. One use case is to quickly ‘halt’ a campaign for whatever reason, perhaps temporarily, for example, when an advertiser asks you to stop displaying their banners for a while because they are experiencing technical difficulties with their website.
- For a contract campaign, you can select a Priority level between 1 and 10, with the default being 5. It is recommended to leave the priority at 5 unless there is a specific reason to change it.
There is a separate article about contract campaign priorities and how to use this setting to affect how the ad delivery mechanism selects the banners from your contract campaigns for delivery.
Delivery capping per visitor
In this section, you can specify how often an individual visitor gets to see the banners of the campaign:
- You can limit the number of impressions per visitor for the entire duration of the campaign.
- You can limit the number of impressions per visitor per session. A session ends when the visitor closes their browser (for example by shutting down their computer).
- You can also force the Revive Adserver software to restart its counters for impressions after a number of hours, minutes and seconds.
Frequency capping uses cookies to store the impression counters. On a browser that does not accept these cookies (for whatever reason) the Revive Adserver will not display the campaign at all, just to be on the safe side. If you tick the “Show capped ads if cookies are disabled” checkbox, then Revive Adserver will display the ads, completely ignoring any delivery capping settings, and not attempting to use any cookies.
Miscellaneous
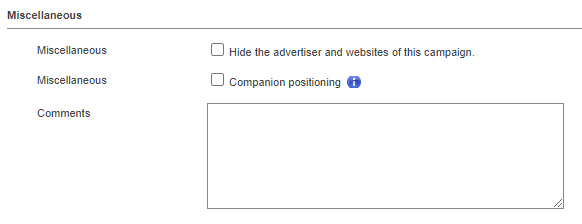
The final part of the campaign properties screen has a number of options:
- You can tick the checkbox to “Hide the advertiser and websites of this campaign”. This means that a website owner who has been given their own login to review the statistics for their site(s) can not see some of the details of the campaigns running on their site(s). Instead they will see the name listed as “anonymous”.
- You can tick the checkbox for “Companion positioning”. This means that the Revive Adserver software will ensure that when one banner on a page is from a campaign, then all subsequent banners on the page will be from the same campaign.
- You can enter some comments about the campaign, which will simply be stored. They will not affect the performance of the campaign in any way. Keep in mind that others who have access to these properties will be to see the comments you enter here.
Save changes
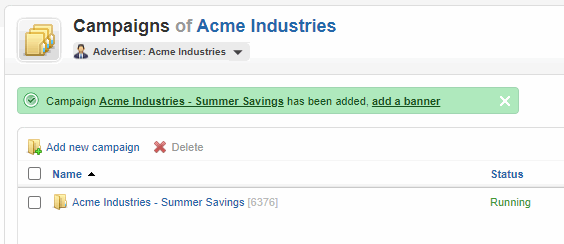
Having saved the new campaign, you’ll return to the Campaign Overview for the advertiser. There will be a message to confirm that the campaign was added, which also includes a link that will enable you to create the first banner for the new campaign.
Next steps:
or
Articles about How to Use Revive Adserver
Websites
Check out the Hosted edition of Revive Adserver
Keen to start using the Revive Adserver software, but not so keen to download and install it on your own server? Revive Adserver Hosted edition might be just right for you!

